
Bell Sleeve Wrap to Wrap Tunic!
The Bell Sleeve Wrap 1219B becomes a long wrap tunic with some very simple alterations to the pattern. Original post 2014.
2021 Available again! Released as a downloadable pattern, this previously sold-out pattern is ready to inspire your creativity!

Pattern alterations
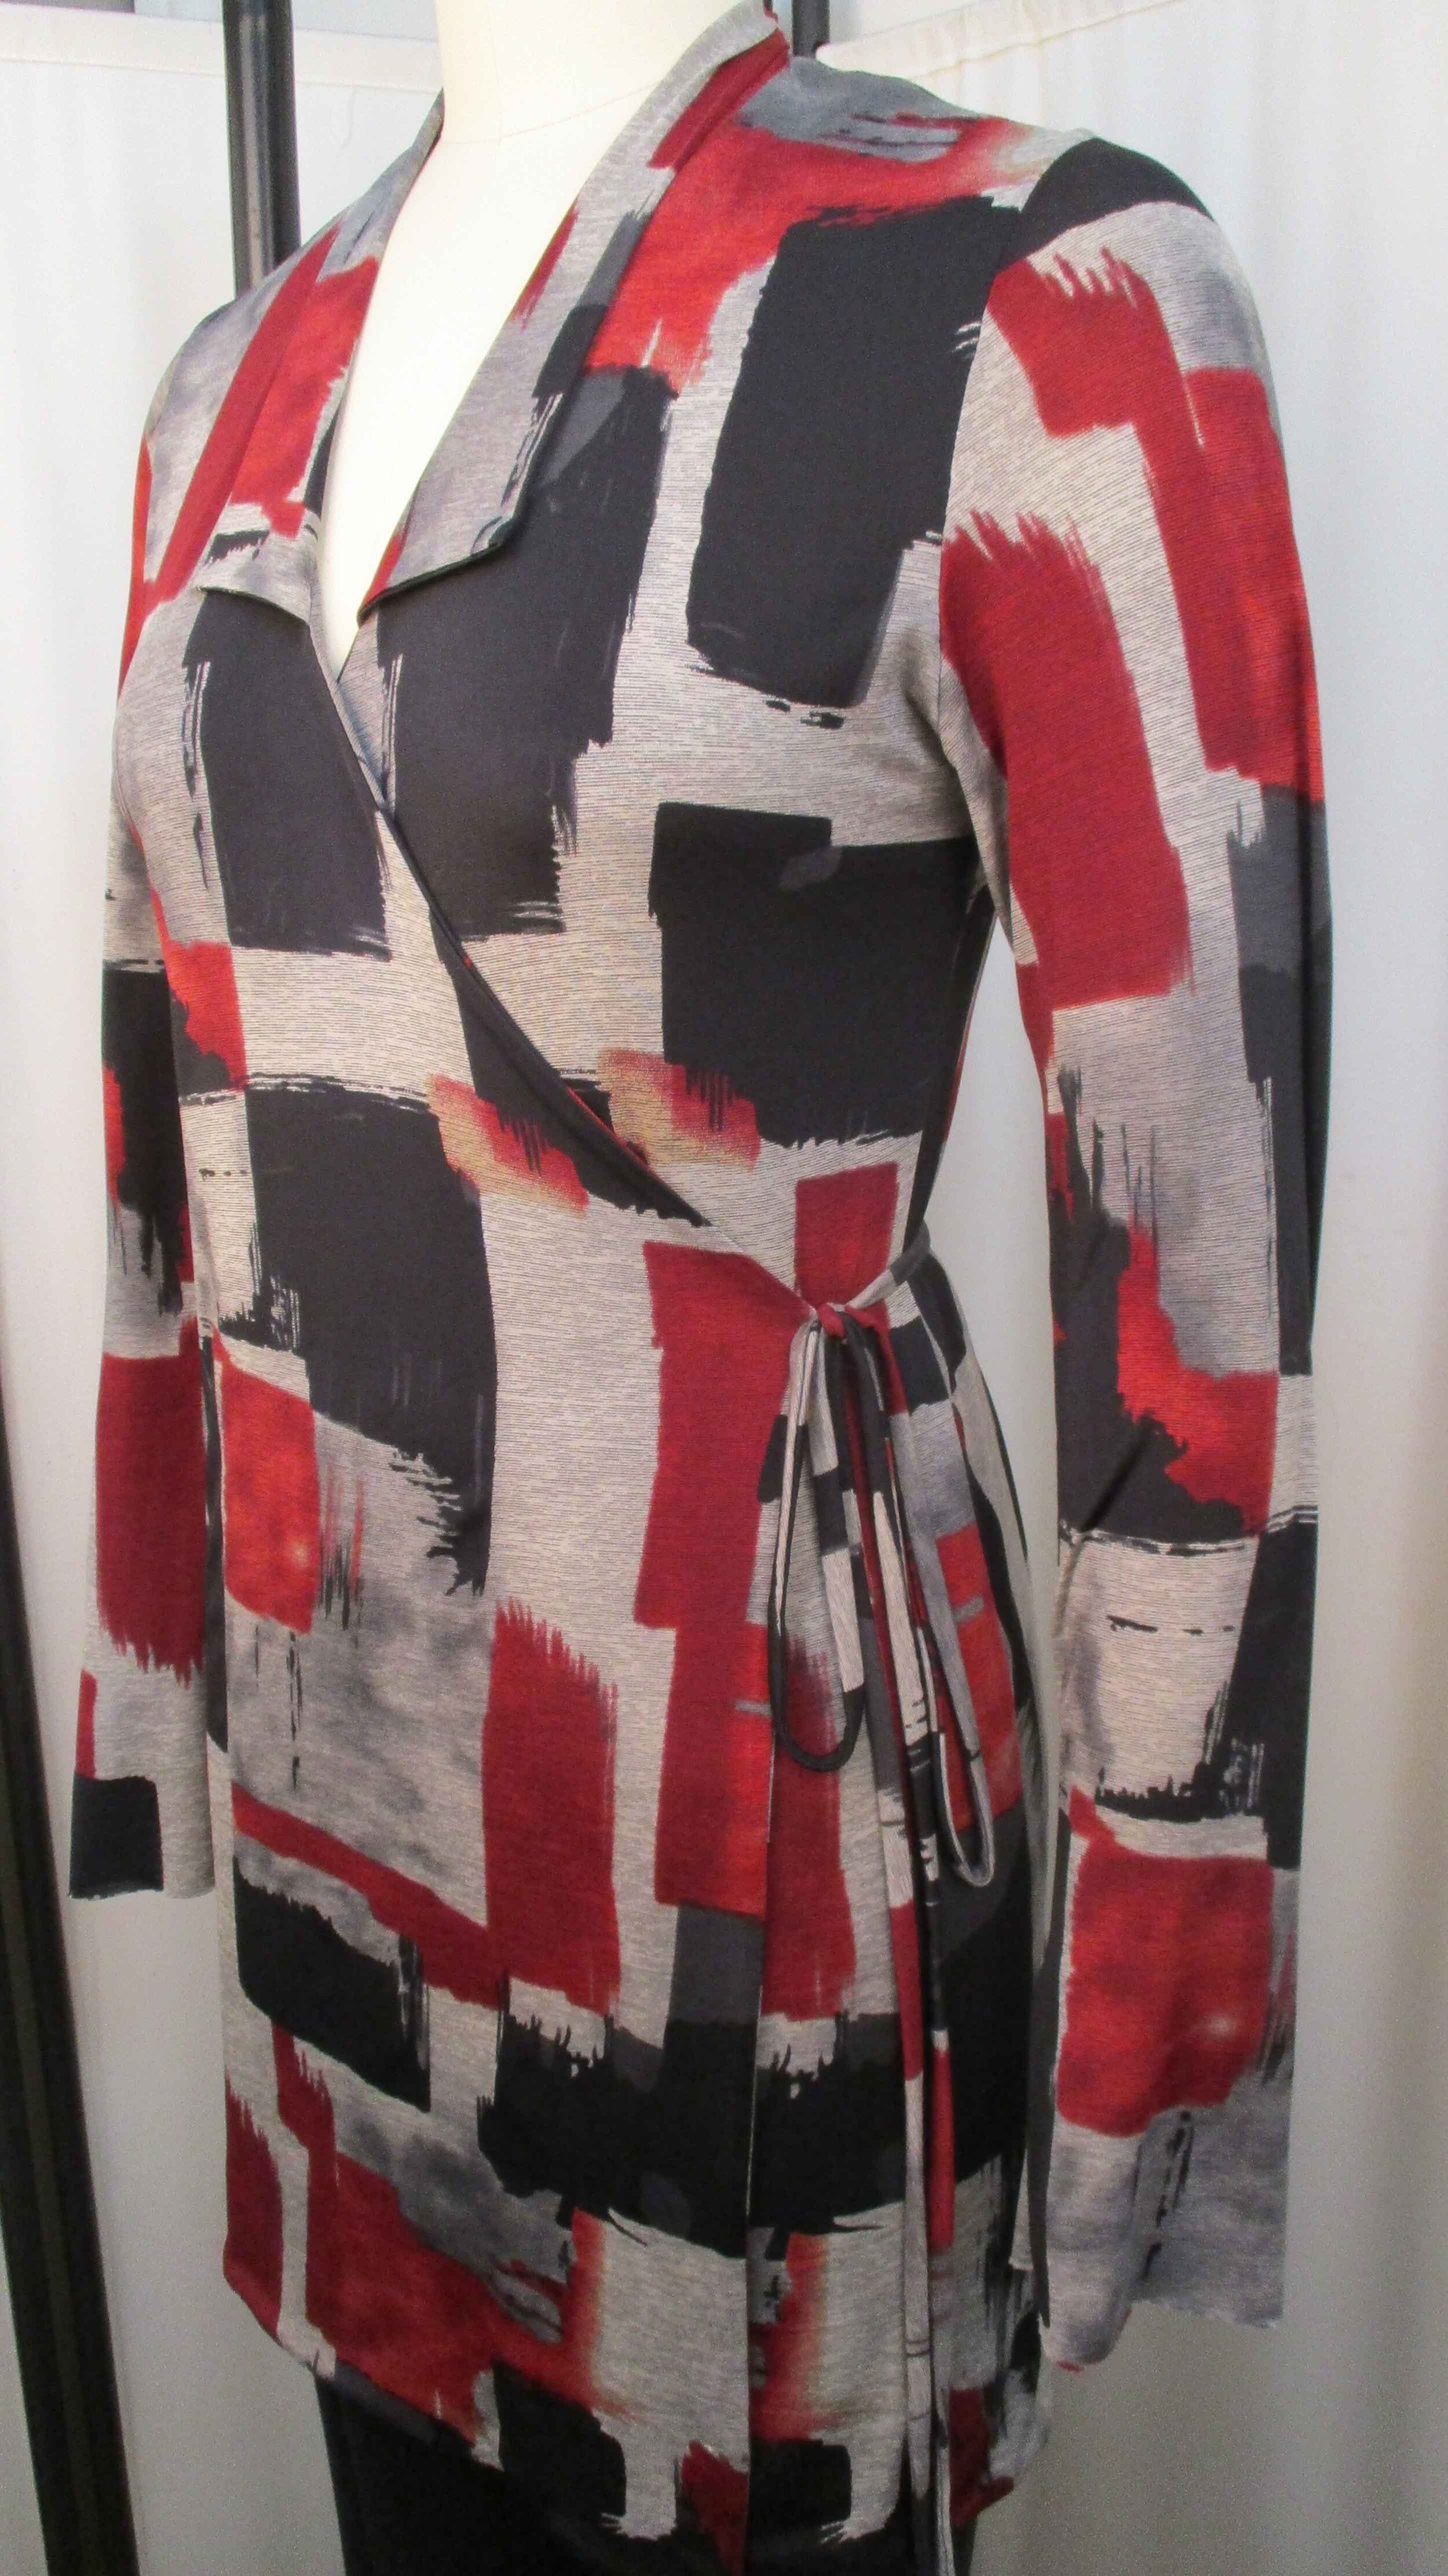
I decided to add 10" (25cm) to the pattern by cutting at the lengthen/shorten line and extending the length. The original pattern has an angled design seam at the wrap over that I did not want for this longer version.

Slash and spread at lengthen line, be sure to adjust hem width to allow for hips!
Using my straight edge ruler I lined up the grainline on the pattern and extended it 10” (25cm) and taped the pattern tissue down.
Then I measured my hips, compared that measurement to the tissue pattern measurements chart and found out to give myself the extra ease I needed at the hip I needed to add a few inches as well as extending the length. As you can see, by straightening the wrap over end and following the side seam to the hem I added about 3 inches.

For the back I just extended the center back fold line 10” (25cm), layed the front pattern piece over the back and traced the new side seam. Very quick and simple.
Add a collar
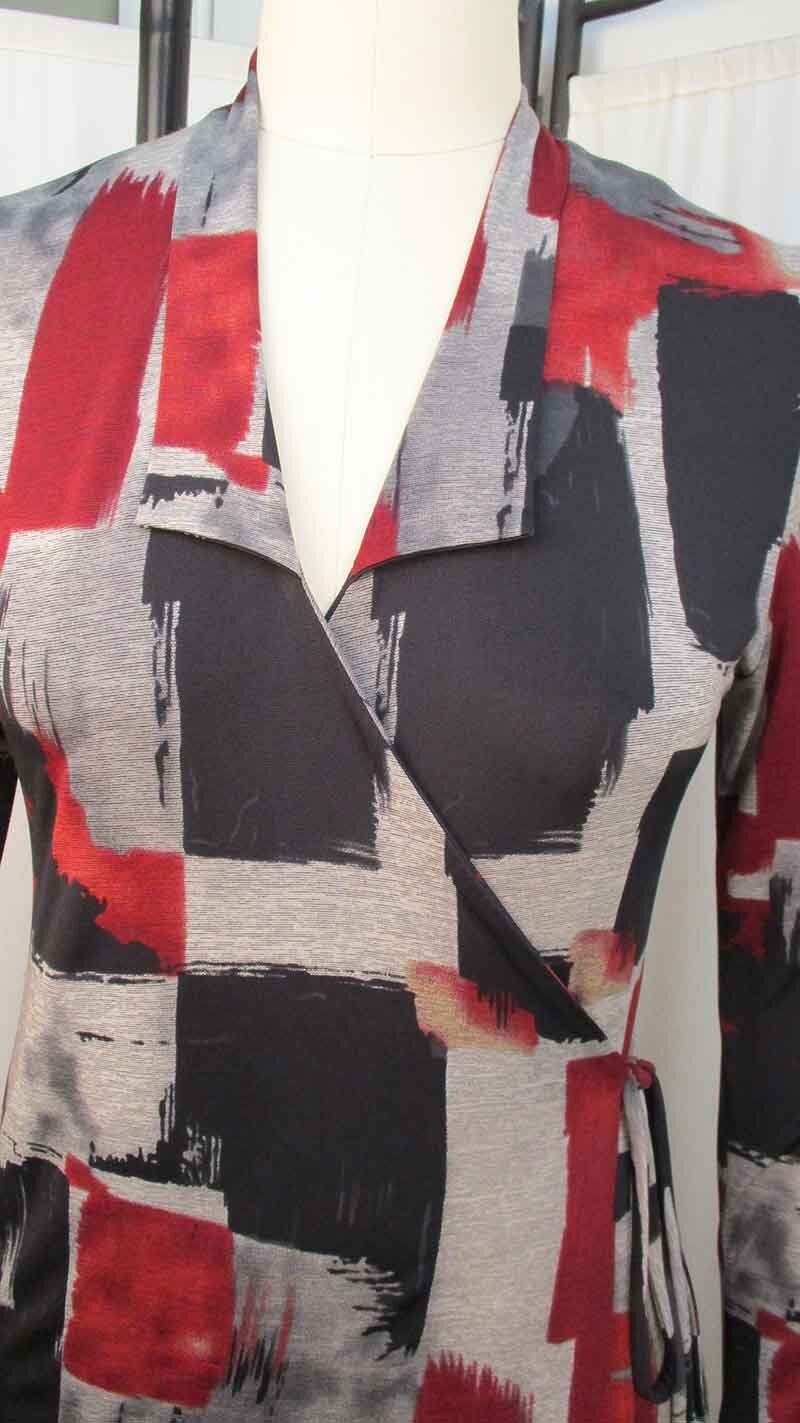
I wanted to add a small collar to the neckline and used the collar pattern from the Wrap Dress as a good starting point. It is just a simple rectangle. I thought that would be an quick and easy place to start to make a collar pattern to fit this neckline.

I measured from the center back neckline, over the shoulder seam and down to the place I wanted to collar end. That measurement was 12" (30cm). I doubled that measurement and added the seam allowance. Then, I decided that I wanted the finished collar width to measure 3” (7.6cm). I doubled the width measurement and added the seam allowance for a total of 7 1/4” (18.4cm). So my finished collar pattern measured 25 1/4” x 7 1/4” (64cm x 18.4cm). This collar can be a simple rectangle. Sewing it together is a snap... I serged the ends right sides together, folded it right sides out and pressed the fold line. Then I basted the long edges together. It is all ready to be attached to the neckline!
Sewing and ties
After the simple pattern alterations, and making the collar I followed the instructions that came with the pattern. Even though I wrote the instructions I still read and followed them! After making the collar I almost forgot to baste it to the neckline!
Instead of making the long ties that wrap around the top I decided that I wanted it to tie just at the left side seam. So I made the ties much shorter and added one tie inside the right-side side seam. You can also use a button/loop or hook and eye. So now the underwrap is tied on the inside and the overwrap ties at left. Very cute!
Because this top is self-lined there is no hemming or topstitching. except the sleeve hem. After the seams and hem are serged the top is turned right side out through an armhole. Then the armholes are basted wrong sides together and the sleeves are serged in! All done! The entire top from beginning to end took me 2 hours. You can do it too!
Have fun!
